Tuesday, 22 July 2014

Craft Stamper Magazine July - "Take It Make It Challenge"     


The Embossing Resist Technique.
For this months challenge I've made a card using a large stamp by Hero Arts - Flower Text S5506. I stamped onto white card with clear embossing ink, then used white embossing powder. Once this was cooled I began to ink over the top with Distress Inks. I used Tumbled Glass, Broken China, Stormy Sky and Faded Jeans.
This really made the white embossing pop.

I  dug out my bag of small paper scraps and began to stamp the flowers & leaves onto various colours of paper. I  embossed them with the white embossing powder as before then fussy cut out each individual element of the design and adhered them down with Matt Medium. For a final touch I added some pink rhinestones. The finished front panel was matted onto white card, then navy card then onto the  white card base & voila!

I hope you like it.


Sunday, 20 July 2014

Mixed-Media Art Journal Collage
QUEEN


I wanted to do something different with my Art Journal so I thought I would try some collage.
I found a picture I liked in a newspaper and fussy cut it out.
I started the page with a stenciled background using Inka Gold in a mixture of Lava Red and Violet mixed together then some gold through a different stencil.  I toned this down with watered down wash of white Gesso.
Before I glued down my image I added a stamped butterfly wing which I coloured with Derwent Inktense Pencils. I added some shading around the edge of the image and also some doodling. I gave her a crown of chipboard coloured with Inka Gold in Bronze. I wrote my caption aroud the image with a Black Faber Castelle Pitt Pen.

I have a video of the creation process below.


My Video of the creative process

Saturday, 21 June 2014

DAY TAGS FOR MARTINA HUPPERTOVA


Martina Huppertova on YouTube was holding a competition challenge (I believe it's closed now) to make Day Tags that she will be including in her weight loss journal. The rules were to create a tag and it had to be a certain size and include 7 text fields. You could only use the colours Pink, Black, White and Silver.She has made over 100 of these tags herself which she documents on her YTChannel
https://www.youtube.com/user/2101JustPerfect/videos but she will be moving house soon and has had to pack up her craft room, so she thought it would be great fun to have some tags made by her subscribers to add to the journal and she will do a prize draw once all the tags have been shown.

The requirement to enter the competition was for just one tag, but I had so much fun creating the first one that I went on and made three.

I love the organic looking background on this tag. (If you want to know how I created it look out for my next YouTube video where I show a step-by-step tutorial). I added seed beads and sequins for more texture and I really didn't want to cover any of it with Text fields. I deliberated for a long time for the best way to add the fields without ruining the effect of the background and then had had the idea of the pretty butterflies.  I then punched a hole, added an eyelet and some of this lovely whispy trim. To finish I edged the tag with pink glitter glue.

For this tag I used two different patterns of Duct tape. The zipper die-cut is by Marianne's Creatables and I used a small circle punch for the text fields which I shaded around the edges with Distress ink. I punched a hole then added an eyelet and fluffy trim.

Again I've used Duct Tape for the background. I die-cut hearts from black card, Heat embossed the edges with silver embossing powder. I added silver glittery glue around the edge of the tag. An eyelet and black trim finished it off.

Thursday, 5 June 2014

ART JOURNAL PAGE - "STARS"


A new Mixed-Media Art Journal page I've created today entitled "Stars"
This page is a tribute to all the lovely friends I have made on You Tube who live all over the world.
There is a short YouTube Time lapse video at the end of this post showing the creation of this page.

I first wet the page with water then dropped on some Liquitex Acrylic Ink in Quinacridone Magenta and allowed it to find it's own organic path. I helped it along in places by blowing through a drinking straw to create veins of ink. Once thoroughly dry I splattered randomly on the page with Carbon Black Liquitex Ink.
To give the piece texture I adhered a length of cheese cloth which I pulled about to tatter the edges. On top of this I adhered a length of pink plastic netting (Recycled from some wrapping around fruit) which I also distressed along the edges. I printed my sentiment onto pink card using my P. C. then die cut it into a heart shape. I inked the edges with Picked Raspberry distress ink then used hot glue to stick it on the right side of my page. (If you have any glue spots showing through the textiles you can use these pieces to cover them from view).
I had found a large bag of unusual shaped sequins on one of my shopping sprees and I adhered these on randomly to represent stars and other objects in space. I also added silver rhinestones. Finally I matted the piece onto copy paper that I had coloured the edge with an alcohol ink marker which matched the pink colour on my page. Then matted again onto black card before finally adhering it into my journal.
I was very pleased with the final result. Sometimes you just know when something feels right. 


Here is the video


Tuesday, 3 June 2014

BIRTHDAY CARDS FOR MY LOVELY MUM


I've been busy over the last few days making a couple of birthday cards for my lovely mum.
I needed to make two as my daughter asked me to make one for her to give too.

I decided to utilize the help of my Brother ScanNcut cutting machine and these are what I came up with.


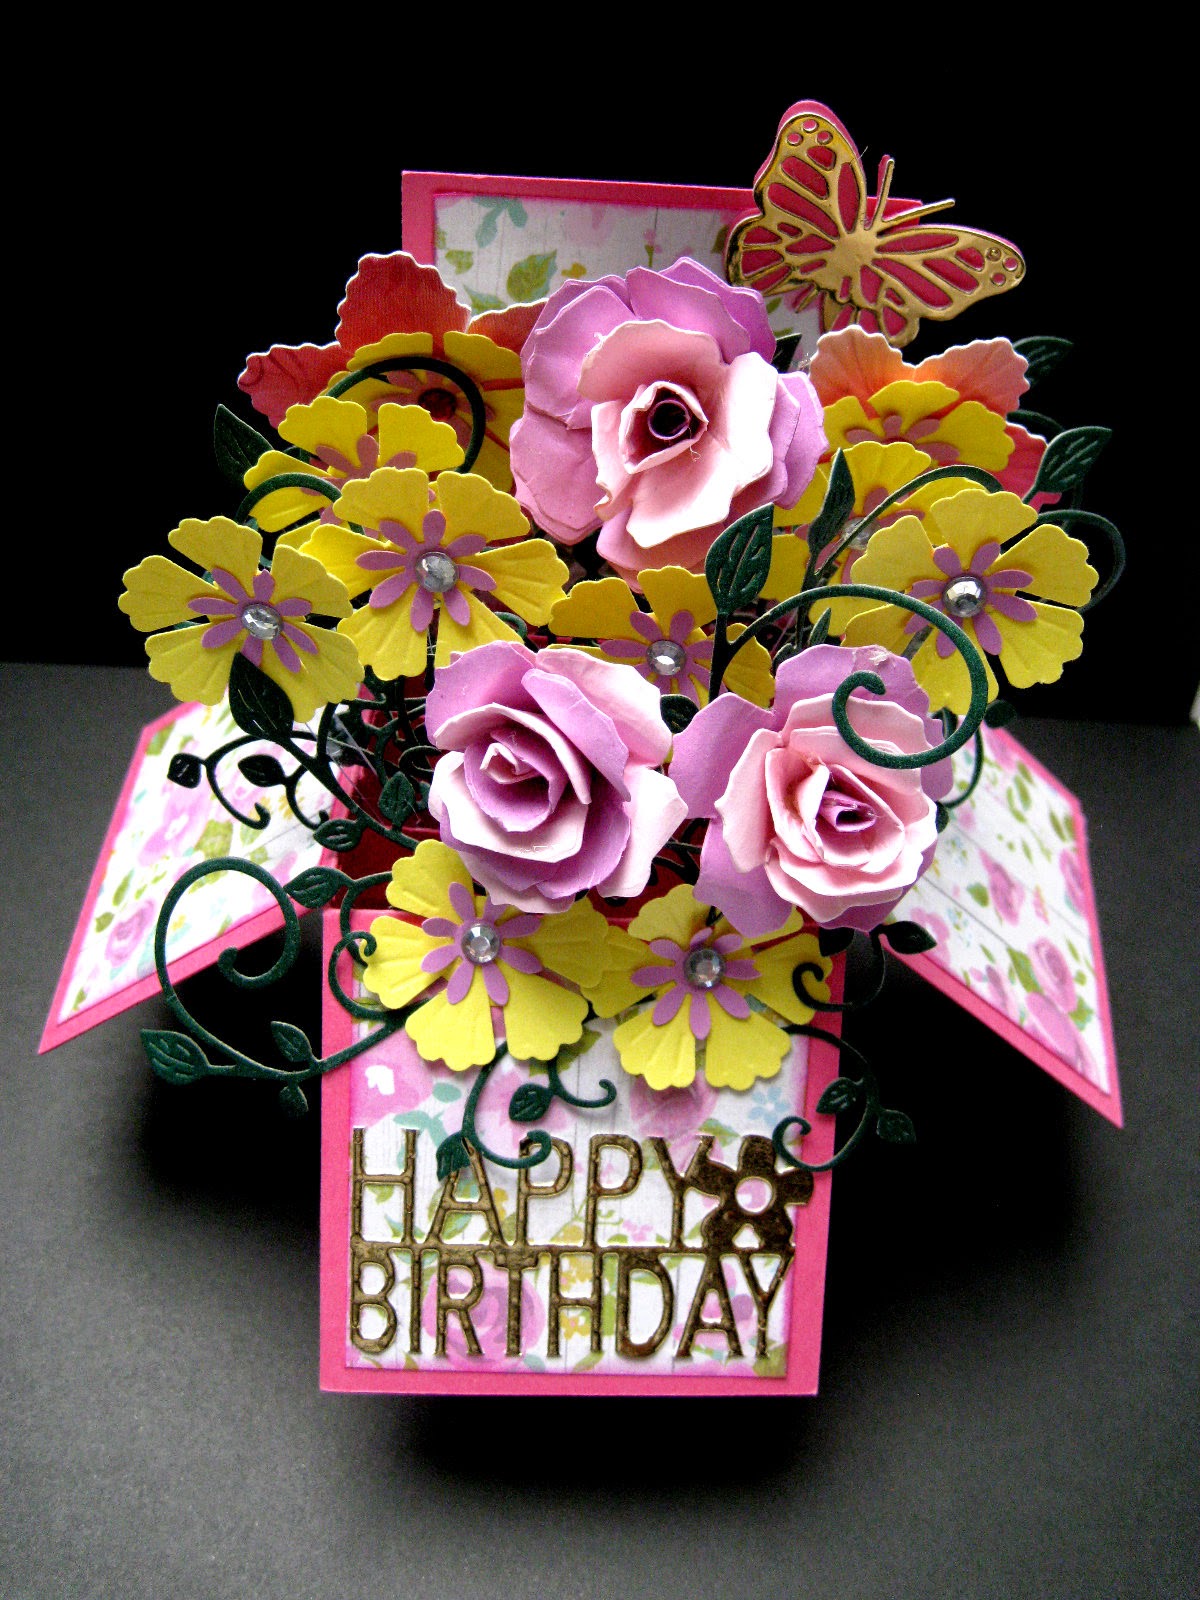
I absolutely love how this card turned out. I used a cut file for the box which was a freebie from applelover53 on YouTube. Once assembled I die-cut and assembled flowers from dies and punches in my stash then adhered them onto thin acitate strips with tacky glue. I then adhered these to the three cardstock ledges that run across the inside of the box. I die-cut lots of green leafy flourishes with a Cheery Lynn die and randomly added these between the flowers.


Here you can see the ledges for mounting the flowers.


The Happy Birthday on the front was die-cut from a free die which came with a magazine. I cut off the frame and just used the internal letters. I then added a Butterfly die-cut from the Diamond-Dies die.
I made my flowers quite dimensional as my box wasn't going in the post. If you want to mail it you would need to create flat flowers. It's an amazing card concept as the whole thing can fold flat to fit in an envelope. I shall definitely be making more of these in the future.  

For the second card I used a free cutting file I found on the internet from a lady called  Bird (http://www.birdscards.com/) to cut out the lattice front of the card. I covered this with glitter glue and once dry I mounted it onto light blue card and then again onto the white card base. I die-cut a small label which I mounted onto light blue card and inked the edges with Broken China Distress Ink before adhering to the center of my card. I used the ScanNcut again to cut out the word "Nana from the same light blue card and added this to the white lable. I die cut a butterfly using a die from Diamond-Dies from Blue Miri card and a silver miri card base. I added silver rhinestones to the center of several of the lattice flowers.

Monday, 21 April 2014

EASTER JOY


As it's Easter and we've all got a few days vacation I thought I'd relax and play with my Art Journal.

My lovely mum has recently bought me a Brother ScanNcut machine so I wanted to experiment with it a bit and see what the cuts were like that were included with the machine. This lead me to be inspired to create this whimsical Easter page featuring none other than the "Easter Bunny" himself.

I've used a lot of pastel colours and wanted to create a whimsical dream like piece.
I sprayed the background with Crafty Notions Colour Spray in Blue Lustre, Lindy's Stamp Gang Starburst Sprays in Baby Blue Eyes and Delphinium Turquoise. I then stamped over all the background with Aquamarine Archival Ink on a Kaisercraft Texture Stamp called Hessian. I freehand cut some hills from card and cut a couple of grass borders with my ScanNcut. Using an X-cut die I used up some of my scraps by cutting some Hexagons. I used another die, this time in an oval and cut another shape to be my egg. I painted this with Liquitex Unbleached Titanium and stamped over the surface with Colorbox Cats Eye ink in Creamy Brown using a Shiela Douglas "Ageing Beautiful Crackle stamp from her A Little Bit Sketchy range. I diecut the daisies in white and pink using a Die-namites die called Daisy Bunch DN-1012 and used "Fluffy Stuff" by Woodware in the centre of each flower and puffed it up with a heat gun. I used my ScanNcut again to cut the carrots, clouds, the sun and the Easter Joy lettering.

Once the letters where adhered into place I outlined them with a Stabillo Fine Liner pen in black and added some shadow with a Faber Castelle Big Brush PITT pen in Cold Grey. I then covered each letter with Glitz Glitter Glue in Iridescent Sparkle. I also added a bit of this same glitter glue to the bunny's bow.

I added "Fluffy Stuff" by Woodware to the centre of my sun and also to the centre of each flower as shown below. I then puffed this up using a heat gun. It gives a great effect.


The crackle stamp used on the egg gives a realistic look.

I hope you like my journal page and if you'd like to see me making it you can watch my YouTube video
below which has a Step-by-step walk though at double speed.


Thursday, 10 April 2014

MOTHER'S DAY 


On the 30th March in the UK it was Mother's Day and I'd like to share with you a card I made for my lovely Mother. I hope you like it as much as she did.

I folded the front of the card base back on itself and die-cut a half circle into the edge with the fold. I trimmed off half an inch from the other end and then embossed half of the card front up to the fold using a Dots embossing folder. I created a fringe using fringe scissors and adhered this to the underside of the folded card front. I then glued the whole of the folded card flap down onto itself so that it no longer flipped open. I die cut 2 labels, the larger one in the same colour as my flower and layerd one on top of the other. I then stamped and embossed my sentiment. I adhered this to the front of the card and added a gold die-cut butterfly by Die-mond Dies to the edge of the label and placed a gold die-cut corner by Marianne's Creations near the top of the card.

I stamped stems & leaves onto the inside of the card and embossed them with Verdigris embossing powder by Ranger. I then used one of the Papermania Big Blooms as my bottom flower. I stamped and fussy cut several other flower parts which I adhered on top of the large one and then to finish it off, a gold punched flower and a resin center.

I had a couple of die-cut leaf stems which were similar to the stamped image I already added, so I glued those in between the others to give some dimension. I then continued the theme of the front of the card and added another gold die-cut butterfly and two more gold corners. I die-cut another large label but this time in white card and glued it onto the back of the other labels for neatness. It also gave me a place to write my message.

The center resin piece has a basket weave design - Very cute..